Hi @Flow!
If I understand correctly, you want to perform some analyses with a large pixel size to speed them up, but then return to the small pixel size for later jobs without having to reextract. This is a great workflow! Here’s my recommendation for how to do this:
- When extracting your particles, downsample them to a relatively small pixel size (i.e., low binning)
- Perform a Downsample Particles job to get your large pixel size particle stack for jobs like 3D Classification
- Perform jobs using the particle stack from step 2
- When you want to go back to the full-size (i.e., low binning) particles, use the Low Level Interface to replace the blob parameters with those from the step 1 extraction.
If you are not familiar with the Low Level Interface, it is a way of plugging parts of one result and parts of another into a job. Below I’ll include an example of replacing the blob part of a downsampled (i.e., binned) Particles input (which contains the path to the images and their pixel size) with the blob from a full-size particle stack.
In this example, job 29 is a heterogeneous refinement with downsampled (i.e., binned) particles. Job 24 is the extract job which was not downsampled (i.e., no binning). We are building a Non-Uniform Refinement in this case, but this process will work with any type of job.
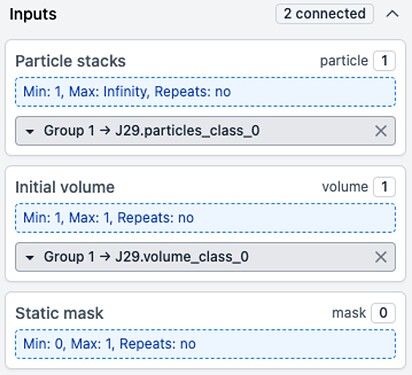
First, plug in the results as normal:
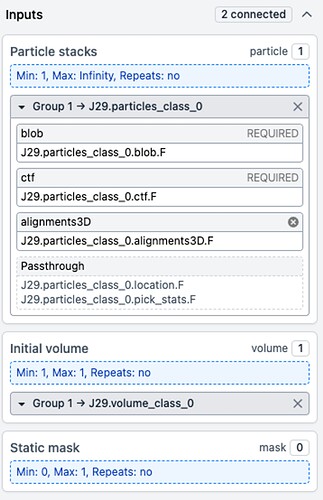
Next, click the small arrow next to the particle stack to open the low-level interface:
Here you can see that these particles have the following parts:
- The
blob, which tells cryoSPARC where to look for the images and their pixel size. - The
ctf, which contains information about each image’s CTF parameters. - The
alignments3D, which contains the pose estimates for these particles. - A
Passthrough, which contains some information from particle picking.
In this case, we want to use the alignments3D from this job (since we want the hetero refinement poses), but the blob from our original, unbinned extract job (since we want to use those poses with the full-size images). So we just need to replace the blob part of the input with the blob from job 24.
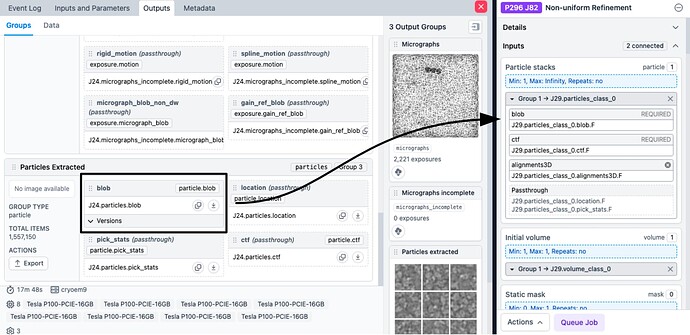
To do that, open job 24 and click the Outputs tab, then scroll down to the Particles in the main window:
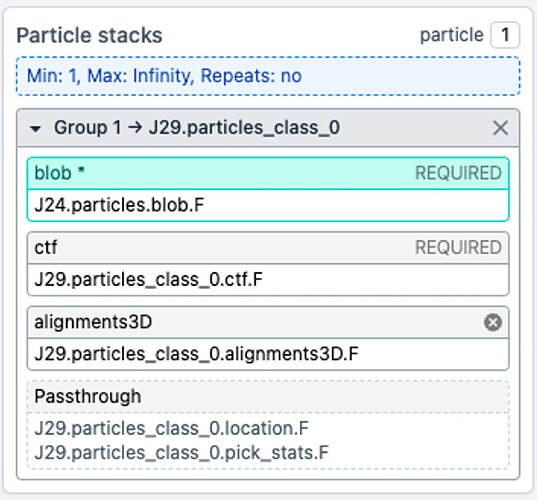
Here we see the blob we need! Just drag the blob (not the entire Particles box!) to replace the blob in the builder! It should glow green when you drag it nearby:
Now you can see our input has the information from job 29, except it is going to pull the images from J24:
At this point, you can adjust the other settings and launch the job! Any jobs after this one will also use the full-size particles, so you only have to use the low-level interface when you want to change the part you want to use.
The low level interface can be confusing, but once you learn to use it you gain a lot of flexibility in the types of workflows you can use! I hope this was a helpful introduction, and please let me know if you have any more questions!


