This feels like a question that has an obvious answer, but I’ve never been able to figure it out, so here I am (couldn’t find it in the archives either).
Semi-often when I am running a Live session I have a micrograph that just processes with one or more stats that make no sense and completely throws off the scale of the Overview plots. There seems to be no way to rescale in order to actually see the rest of the micrographs and determine appropriate thresholds without very tediously zooming in repeatedly. I never have an issue with throwing away that micrograph (usually there is indeed something wrong with it), it’s really just that I’d like to be able to set the X and Y axes manually. This is also a feature that I have wished for when comparing stats between data sets.
Is there a way to do manually set axes or just throw out the micrograph so that the graph at least auto-rescales to close to the correct amount? It’s also been an issue with the Curate Exposures job, but for that at least I can exclude the offending micrograph(s) and re-run the job afterwards.
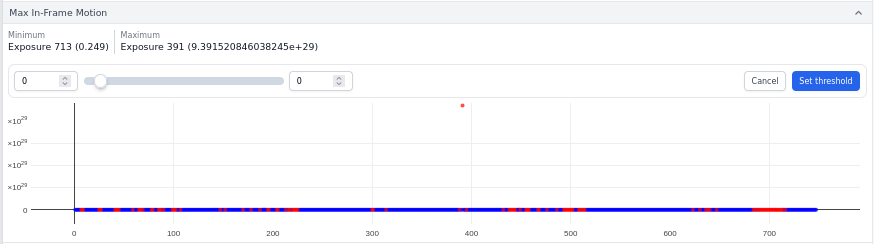
I’ve attached an image here of my most recent session – as you can see the max in-frame motion is clocked at 10^29 so zooming in to the 10^1 scale is incredibly slow. We haven’t upgraded to 4.7 yet, so if it’s there I will be looking forward to it once our administrator returns from away and can upgrade us!
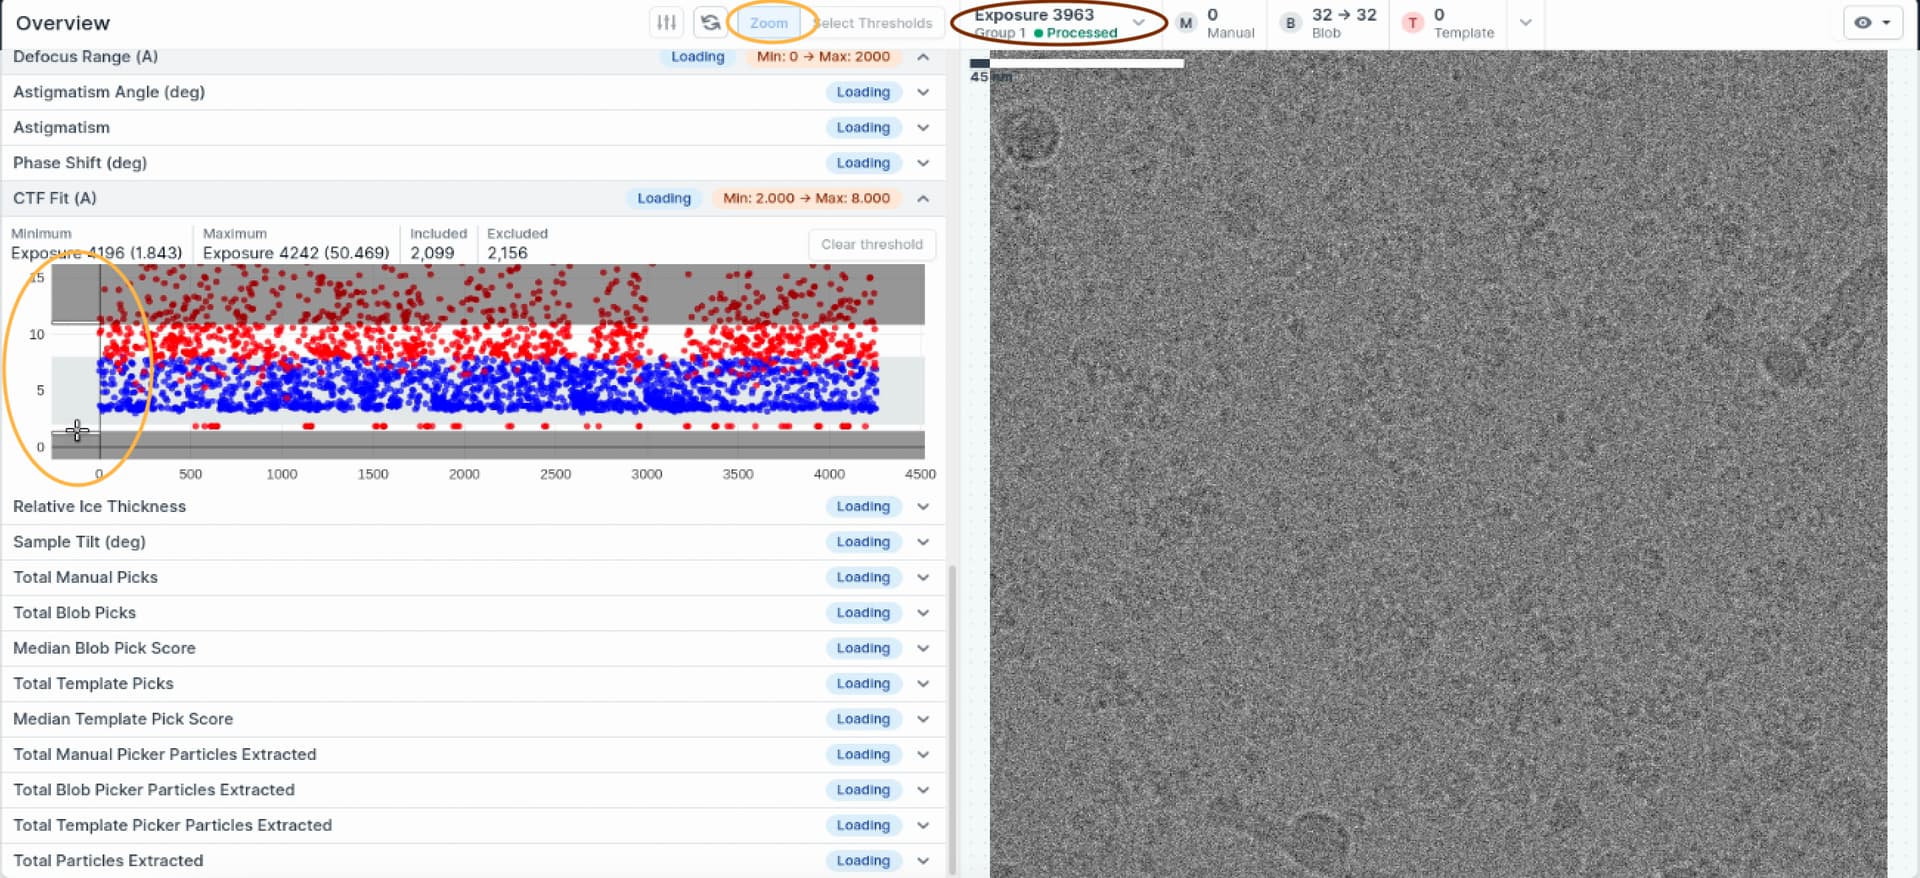
For rescaling the plot, you just need to use the “zoom” tool instead of “select thresholds”. Here’s how:
Hover your mouse on the left side of the vertical axis (or the bottom of the horizontal axis).
Click, hold, drag, and release to zoom in on the desired range of the vertical axis.
This will zoom into the selected area of the vertical axis while keeping the full horizontal range visible.
However, if you have a micrograph with extreme values, this zooming method can be very slow and inefficient. The better solution is to remove the bad micrograph entirely. Here’s how:
Identify the problematic micrograph—either by:
Clicking on it at the top of the Live session, or
Clicking directly on the dot with the extreme value in the plot.
Open the dropdown menu next to the exposure number and select “Copy exposure path”.
Open a terminal (if you’re on Linux) and verify the path by typing:
ls /path/to/the/corrupted/exposure/bad_exposure_name.tiff
I just reject the problematic micrographs and queue up a second exposure curation job using the accepted micrographs from the first job. This not only helps with the infintely large motion problem but will also rescale all plots based on their new min and max.
Yes, the zooming method is positively painful… especially when you get close and then accidentally reset the zoom or otherwise somehow re-scale the graph. After 50 or so zooms I feel like I might as well just ignore the curate exposures option entirely!
Thanks for the second method – that is at least one way to do it and is much better than zero ways to do it! Still would rather have a way to do it from CryoSPARC as opposed to hard removing the micrograph. I generally tell my facility users to mess with their raw data as little as possible so that they don’t delete everything by accident or corrupt their data in any way
Good catch, I read right over the Live part. Would be useful to have a toggle to reset the min/max scaling to just currently accepted micrographs. Or manually set min/max like we can when curating particles.